How to download your garden design software?
We don’t sell software, nor do we sell subscriptions. You buy photo credits of your exterior to download without time limit for your landscaping projects. For example, if you buy the “large spaces” offer today, you can upload a photo of the entrance to your garden and run various tests (a contemporary style, a Japanese style, a natural style…). Then, whenever you like, you can upload photos of the sides of your garden, and finally, even a year later, of the living area outside the house. You manage all this on your personal dashboard, and can look back on each completed project at any time.
You can also entrust our landscape designers with the task of creating your exterior…
What is My Garden Designer landscaping software?
Our software allows you to create garden and terrace decorations with the help of our ingenious system. In fact, we’ve developed garden design software that takes your environmental constraints into account, so we can offer you plants that are truly adapted to your environment. This way, you’ll have more chance of success with your planting, less money wasted on unsuitable plants and more satisfaction in contemplating your beautiful exterior.
How can I find my town?
The site is currently developed for metropolitan France only. We invite people living in other areas to find the French city corresponding to their USDA zone on the attached map: http: //nature.jardin.free.fr/zone.html. All you have to do is enter the name of the town when prompted. That is, for foreigners, indicate the French metropolitan city with the climate closest to your own (e.g. Divonne-les-bains if you live in Geneva). For Dom-tom and southern countries, we are currently working on extending to your regions, for the moment to have the best selection of plants we advise you to put as city: Antibes, France
I don’t know anything about computers, how do I go about it?
We’ve thought of you and created video tutorials that show you exactly how it’s done, step by step. A little tip: if you pause your video and minimize the window (horizontal line at top right), the “Help” button turns red and you can then resume playback at the point where you left off. Children as young as 5 use our tool in computer awareness classes, so it’s accessible to as many people as possible.
Can you explain the offers and photo uploads in more detail?
You have the choice of creating from a pre-registered photo or uploading your own:
“Access to a bank of outdoor images: these are photos of “sample” gardens and terraces that we make available to you for your creation. However, this only gives an approximate idea of the result, as our “model exteriors” are never 100% identical to your own. Their purpose is more to show you the feasibility potential of our exterior design tool.
“Upload photos of your exterior”: upload photos of your exterior and design it directly, adding plants and decorative objects.
If you choose the “discovery” offer, you will be limited in the choice of plants and objects to include. For other Offers, you benefit from the entire catalog and have the possibility of creating several different outdoor layouts from the same photo (e.g. by changing the layout of flower beds, and changing the sytle…), allowing you to choose the creation that suits you best.
For the “large spaces” and “pro” offers, you can upload as many different photos as you have credits, and you can also create several different gardens per photo uploaded.
What can’t you do with this garden design software?
The technology we’ve developed won’t allow you to play with the volumes of your garden, i.e. if you want to virtually move large volumes of soil and place them elsewhere. Our software is designed for planting plans and garden decoration.
We strongly advise you to call on the services of an experienced landscaper for these major jobs.
Our software is 2D, so it’s not possible to see all the faces of objects, which requires 3D technology.
Some of Designer’s functions don’t work on my PC. How can this be?
We have optimized our site for the most recent browser versions, you may encounter problems with the “erase”, “rotate” and “buffer” functions of our Designer on versions older than these:
Chrome 4.0 and above
Internet Explorer 9 and above
Firefox 2.0 and higher
Opera 9 and +
Safari 3.2 and above
We recommend that you update your browsers to optimize the use of our site.
Designer’s other functions work with all versions.
What are the silhouettes for at the start of a design?
Our augmented reality design software is inspired by 3D technology. Silhouettes need to be placed and resized to give you the most realistic rendering possible, with plants and objects automatically adapting to the reference points created by the silhouettes. Be sure to place them in the 4 corners of your space, with their feet firmly planted on the ground. Adapt their size (1m70) to the reference points you have in the photo (plant, furniture…).
Start by placing the two people in the background, then size them, followed by those in the foreground. In general, if the depth of the ground is short (less than 5m), then the 2 people in the foreground should be between 2/3 and 3/4 the height of the image. If the site to be landscaped is longer than 10m, the 2 people in the foreground will be smaller: about half the height of the image.
For triangular spaces, superimpose the two furthest silhouettes.
What tips do you have for downloading photos?
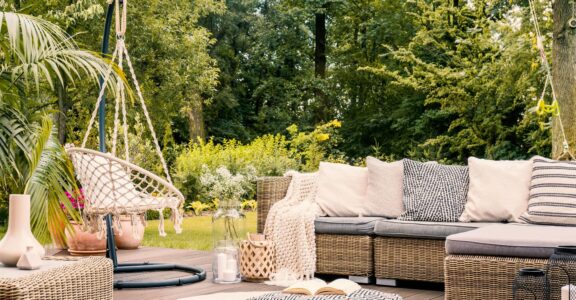
We advise you to take the photo in landscape (i.e. in width), standing where you most often look at your exterior: from the inside for your terrace, for example, or from the entrance to the garden if you want a pleasant entrance.
From the inside: by opening your door or window, when you’re on your terrace.
Take the photo at eye level, looking slightly downwards (imagine an object paused on the ground at least 4 m away).
Photos taken from the bottom of the garden, where the building can essentially be seen, will be reserved for sales advertising by estate agents, for example.
the photo must not exceed 10 Mb, otherwise reduce it using the default PC software: PAINT. Photo reduction tutorial
To find out the weight of your photo, go to the file where it is saved, right-click on its icon and then, at the bottom of the list, select “property”.
What is the purpose of the buffer tool at the start of the process?
This step in the garden creation software is optional, but very practical if you have elements already in place that you no longer wish to see in the photo (plants, decorative objects, pipes lying around…). The process consists in masking what you no longer want to see by replacing it with another part of the photo featuring an appropriate texture.
We advise you to watch the tutorial video, which is a great help.
Are there any rules for adding plants and objects?
We strongly recommend that you always start the design of your garden or terrace with the ground plan, then gradually add the intermediate plans, and finally finish with the first plan. In the case of a large outdoor space, to get a real vision of your future space, we advise you to take several photos by exposure: sun, half-shade, shade, with the choice of plants varying accordingly.
For terraces, the box “Plants will be watered at least twice a week during dry periods (manually or automatically)” is automatically ticked. Why?
As most balconies and terraces are covered by those of the neighbors, there is virtually no rainwater to reach the plants. It is therefore essential to install manual or automatic watering. We advise you to install a simple, self-contained system that will ensure less work and more contemplation. For roofless terraces, you can uncheck this when you display “+ options” in the “add a plant” window.
Is it possible to zoom in on the image to see the arrangement of plants and objects in greater detail?
to zoom in, you can click on “Ctrl” and “+” simultaneously several times until you have the desired zoom effect, and “Ctrl” and “-” to return to the initial position.
How do I add a new project?
We recommend that you open your account via the “my account” button in the top right-hand corner of the home page, and enter your login email and password.
Then, from your user interface, click on the green button “+ Add a project”.
This opens a page called “Registration”, where you can enter your project details and upload your photo.